• Welcome to MCME!

    Minecraft Middle Earth is a Minecraft community that recreates the world described by JRR Tolkien and his writings. Everyone can participate in organized events in which we collaborate to create major landmarks, terrain, caves, castles, towns, farms and more.

    To get started, visit The New Player Guide

    Joining the server

    Joining the server can be done straight away, but you will have to pass the New Player Quiz. Use the The New Player Guide to get acquainted with our community.

    IP: build.mcmiddleearth.com

Finished Misty Mountains [Part 1 - Mountains of Moria]

Finrod_Amandil

Former Head Designer
Supporter
Commoner
Credits
0
XP
0
Cuiva nwalca Carnirassë! Nai yarvaxëa rasselya taltuva ñotto-carinnar!

Hithaeglir
aka
The Misty Mountains

~~~~~~~~~~~~~~~~~~~~~~~~~~~~~~~~~~~~~~~
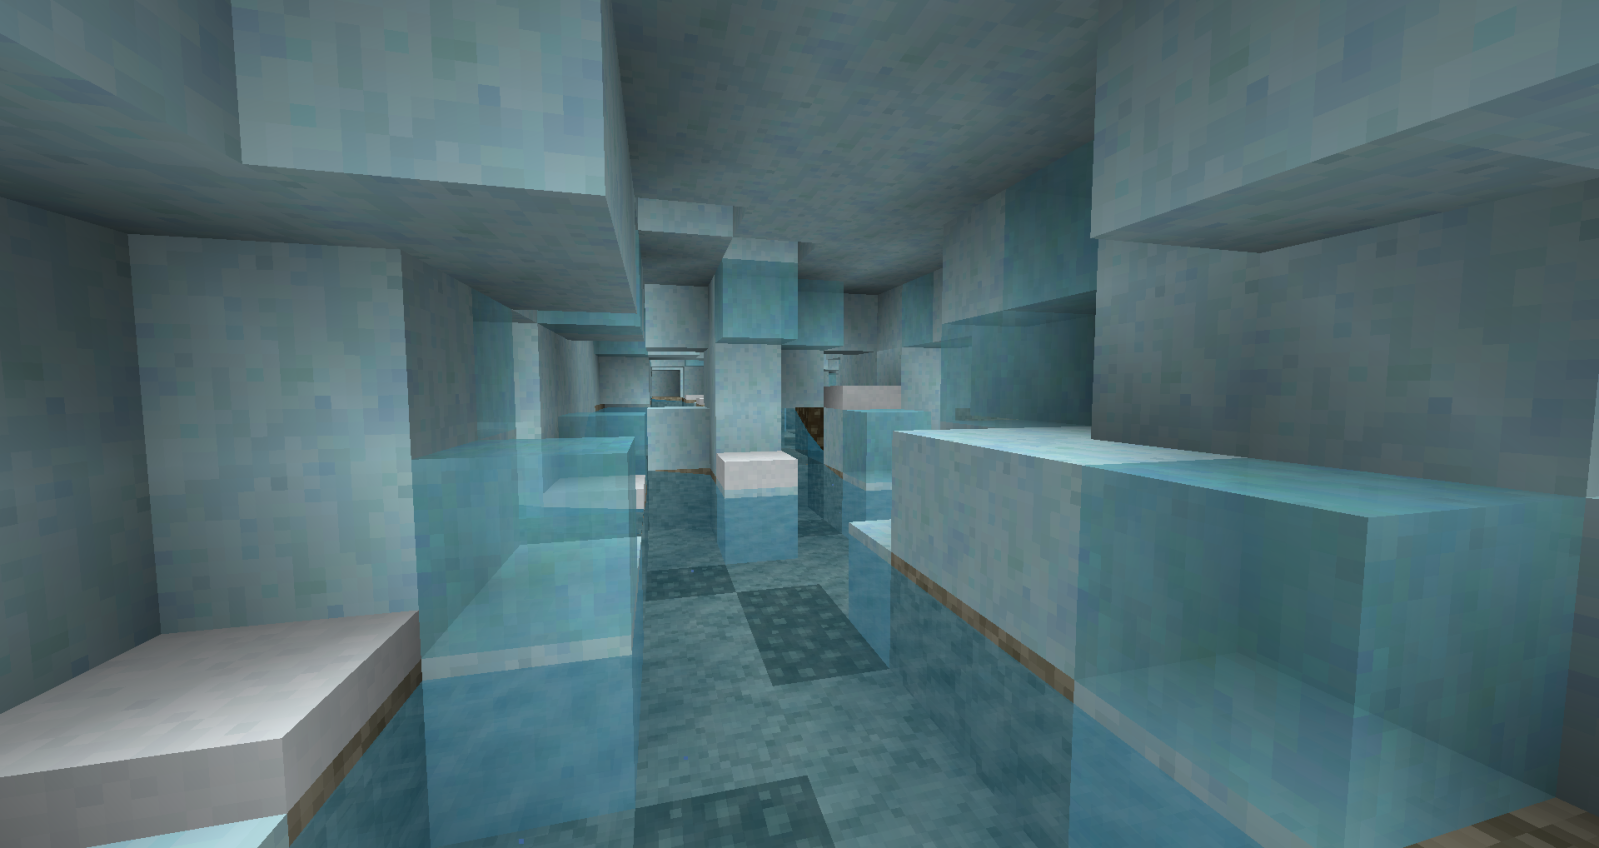
PART 1: The mountains of Moria
~~~~~~~~~~~~~~~~~~~~~~~~~~~~~~~~~~~~~~~

/warp Moria West Gate (permanent)
/warp Moria East Gate (permanent)
/warp Redhorn Gate (permanent)
/warp Mirrormere (permanent)
/warp Cloudyhead (temporary)
/warp Silvertine (temporary)


Project Leader: Finrod_Amandil

Resource Pack: Eriador, Lothlórien, Rohan
Links:
Voxel Wiki (official): http://archive.today/vxIoU
Voxel Guide (MCME), for the use of stencils: http://www.mcmiddleearth.com/wiki/voxel/
Contents

1. Introduction, General thoughts
2. Overall Project Plan
3. Part 1: Map and Project Plan
4. Build Instructions
4.1. Planning
4.2. Rough Terraforming
4.3. Fine Terraforming
4.4. Materials
4.5. Glaciers​
1. Introduction

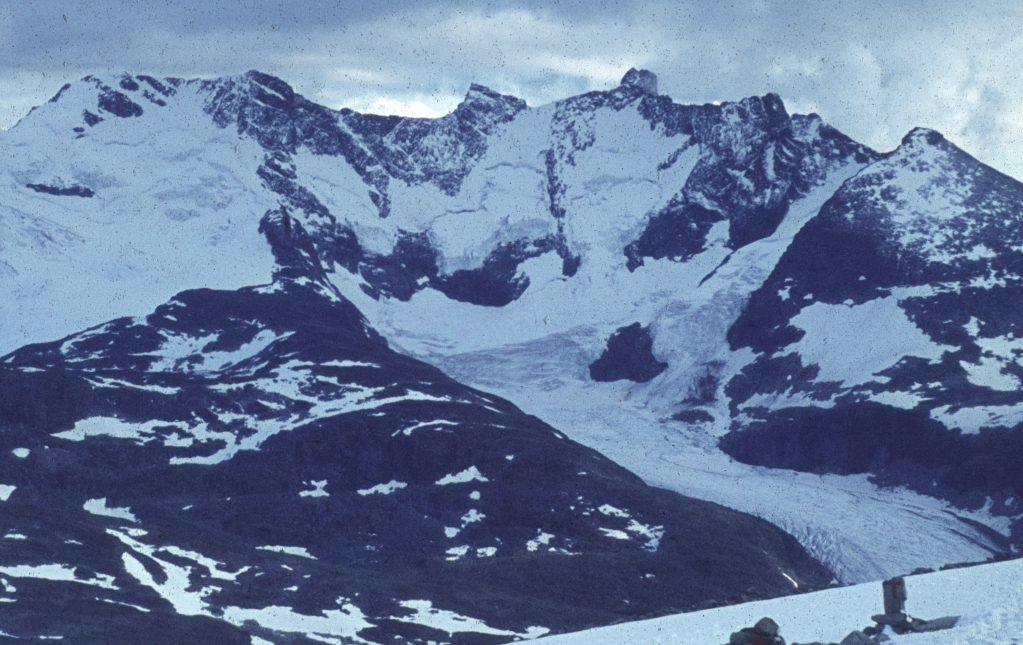
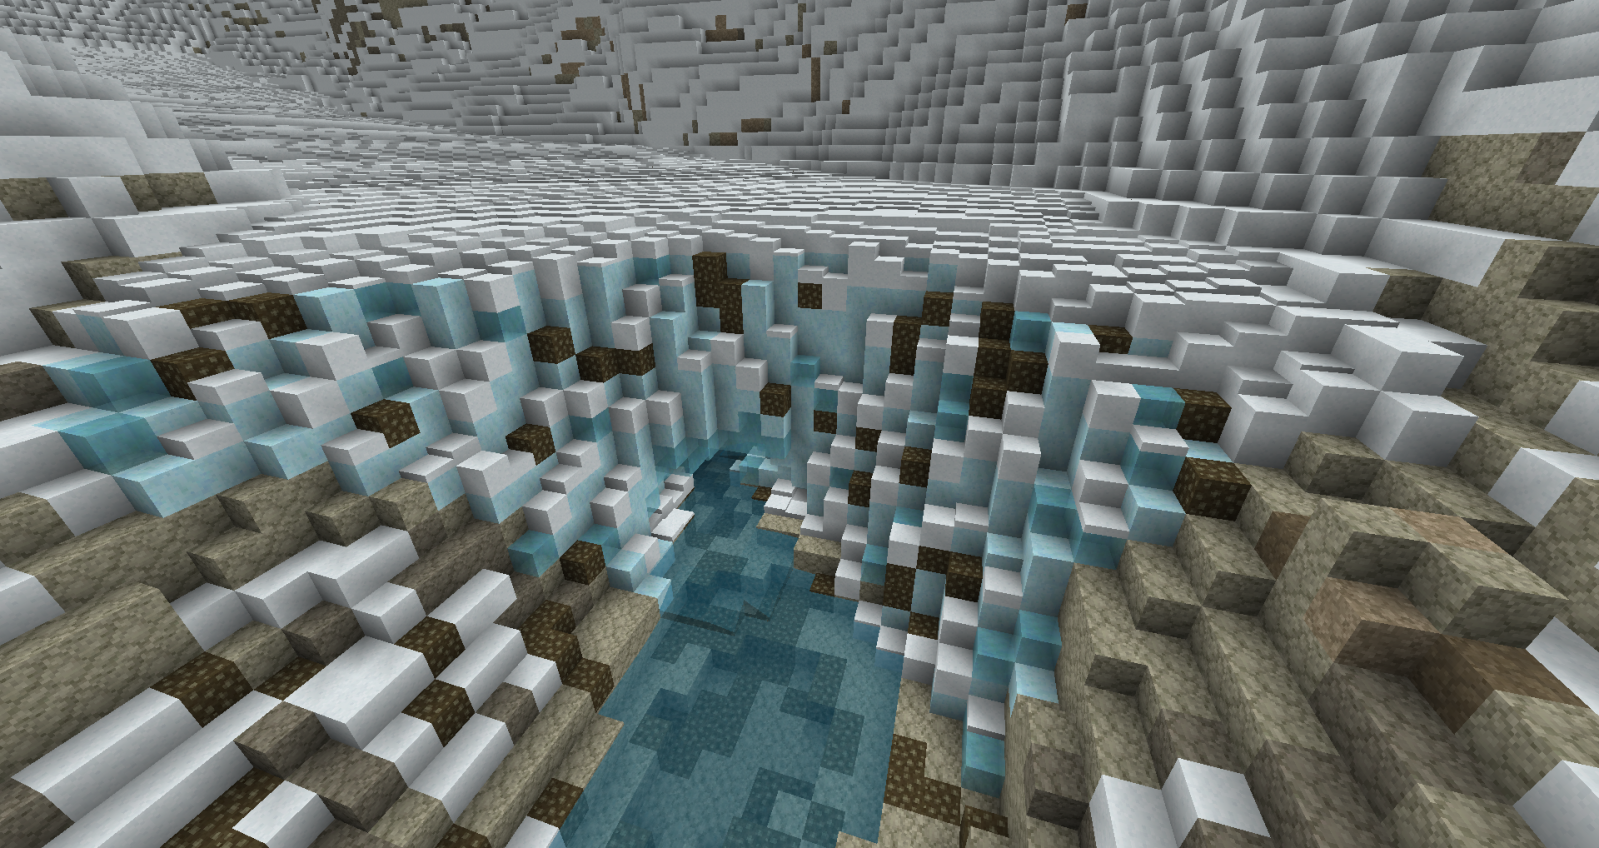
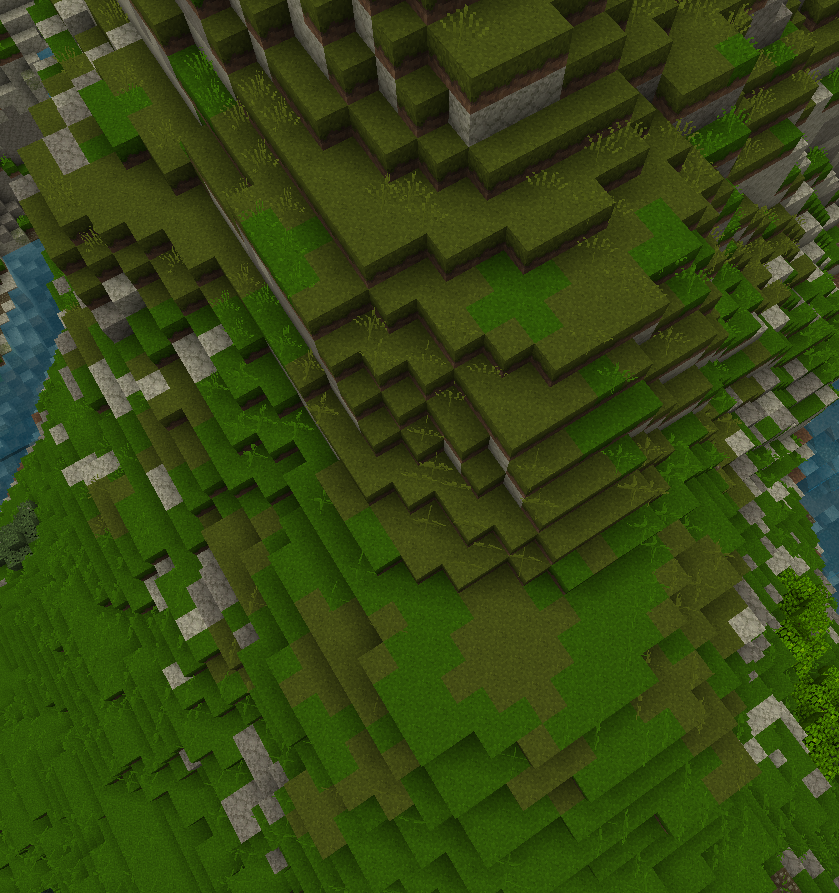
Improving the WorldPainter Misty Mountains is something that silently has always been planned, at least since we did that same thing to the White Mountains. But the true motivation and reasoning of this project is of different nature: In highest regard of @Credoo's and HomieNo's work with the WorldPainter map I have to state that the Misty Mountains were far beyond any consensus with lore and realism, and we all know, even though our project works with blocks, such a primitive principle, that this does by far not reason abandoning any realism. What we did to the White Mountains was a set of improvements driven by hoping to achieve a visual amendment, but here this is only secondary. The goal of this project is clearly realism. But no worries, where I live (which is the same as where Tolkien got his inspirations) mountains look quite epic ;-)

This is a special project, mainly due to its sheer size. Thus this project shall be handled a bit differently than others: The combination of the project size and the target build quality being higher than that of the average terrain work lead to this project being something running alongside with other projects. It will have no ETA or haste involved and its totally predictable that it will probably not be finished within a year* and that it may also stagnate sometimes. Furthermore, now as my holidays are over I won't be able to work on it 8 hours per day anymore :p But I will take care that it is not neglected too much ;)

I hope that with the currently nearly Dimrill Dale I can motivate as many staff members as possible to join in the project and take over one or two sections when they do not have any other project running. I know, such a complete overhaul does take ages and is not always the most fun thing to do, but I hope you won't deny that it's worth it.

*Talking of the whole misties, not only the moria section!

~~~~~~~~~~~~~~~~~~~~~~~~~~~~~~~~~~~~~~~~~~~~~~~~~~~~~~~~~~~~~~

2. Overall Project Plan

Items marked with --> are individual projects and not part of this project.
1. [In progress] Mountains of Moria
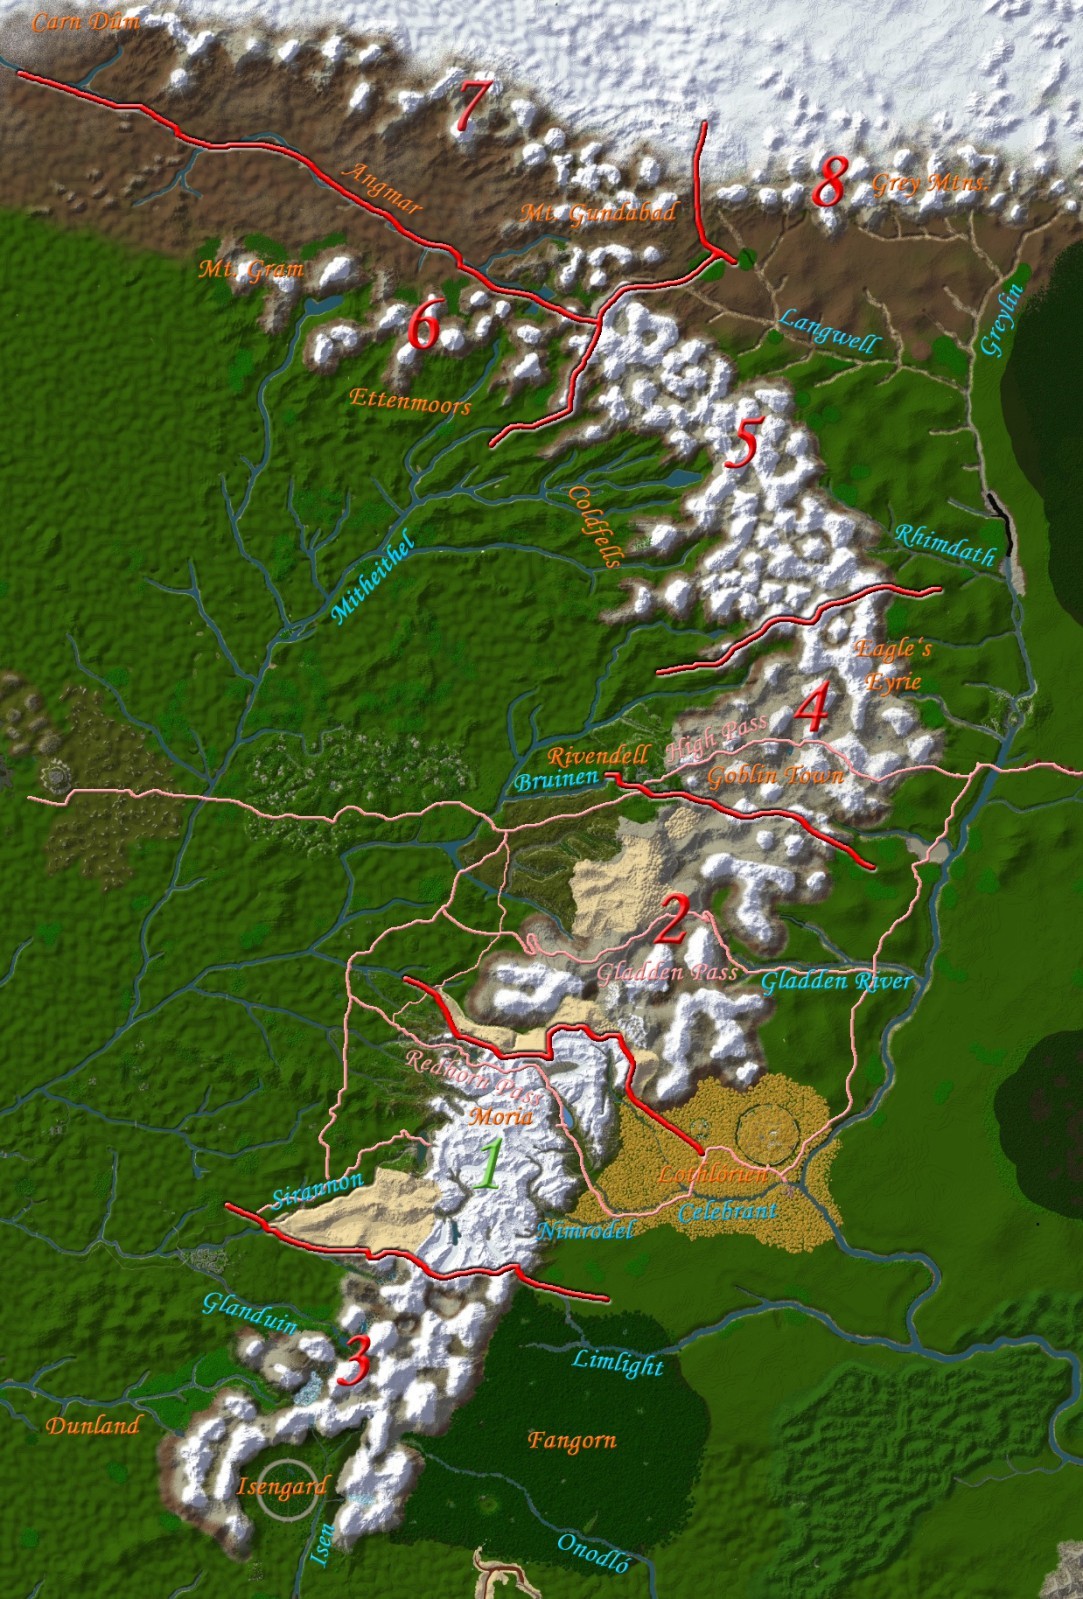
2.
[Coming soon] Gladden Pass & High Moors

Gladden Pass
River Gladden
(-->) Gladden Fields
Hollin Ridge
High Moors of Rivendell
3. [On Hold] Fangorn / Dunland
Nan Curunir
Methedras
Dol Baran
--> Fangorn
--> Isengard

Wellinghall
Glanduin
Limlight
River Entwash
Isen
4. [On Hold] High Pass
High Pass Road
Goblin camps
Beorning toll stations
--> Goblin Town
--> Rivendell
Eagles Eyrie
5. [On Hold] Coldfells
Mitheithel
Rhimdath
Nazgûl tomb

Orc caves from Born of Hope
6. [On Hold] Ettenmoors
Mount Gram
Mitheithel
7. [On Hold] Mountains of Angmar
--> Carn Dûm
--> Mount Gundabad
(8. [On Hold] Grey Mountains)
Greylin
Forest River
n18bc1.jpg


~~~~~~~~~~~~~~~~~~~~~~~~~~~~~~~~~~~~~~~~~~~~~~~~~~~~~~~~~~~~~
3. Part 1: Mountains of Moria - Map and Project Plan
15cdkdt.png

Key:
▬▬▬ Section borders
▬▬▬ Rivers & lakes
▬▬▬ Roads


Color Code:
Green: Finished
Orange: In Progress
Red: Open / On Hold


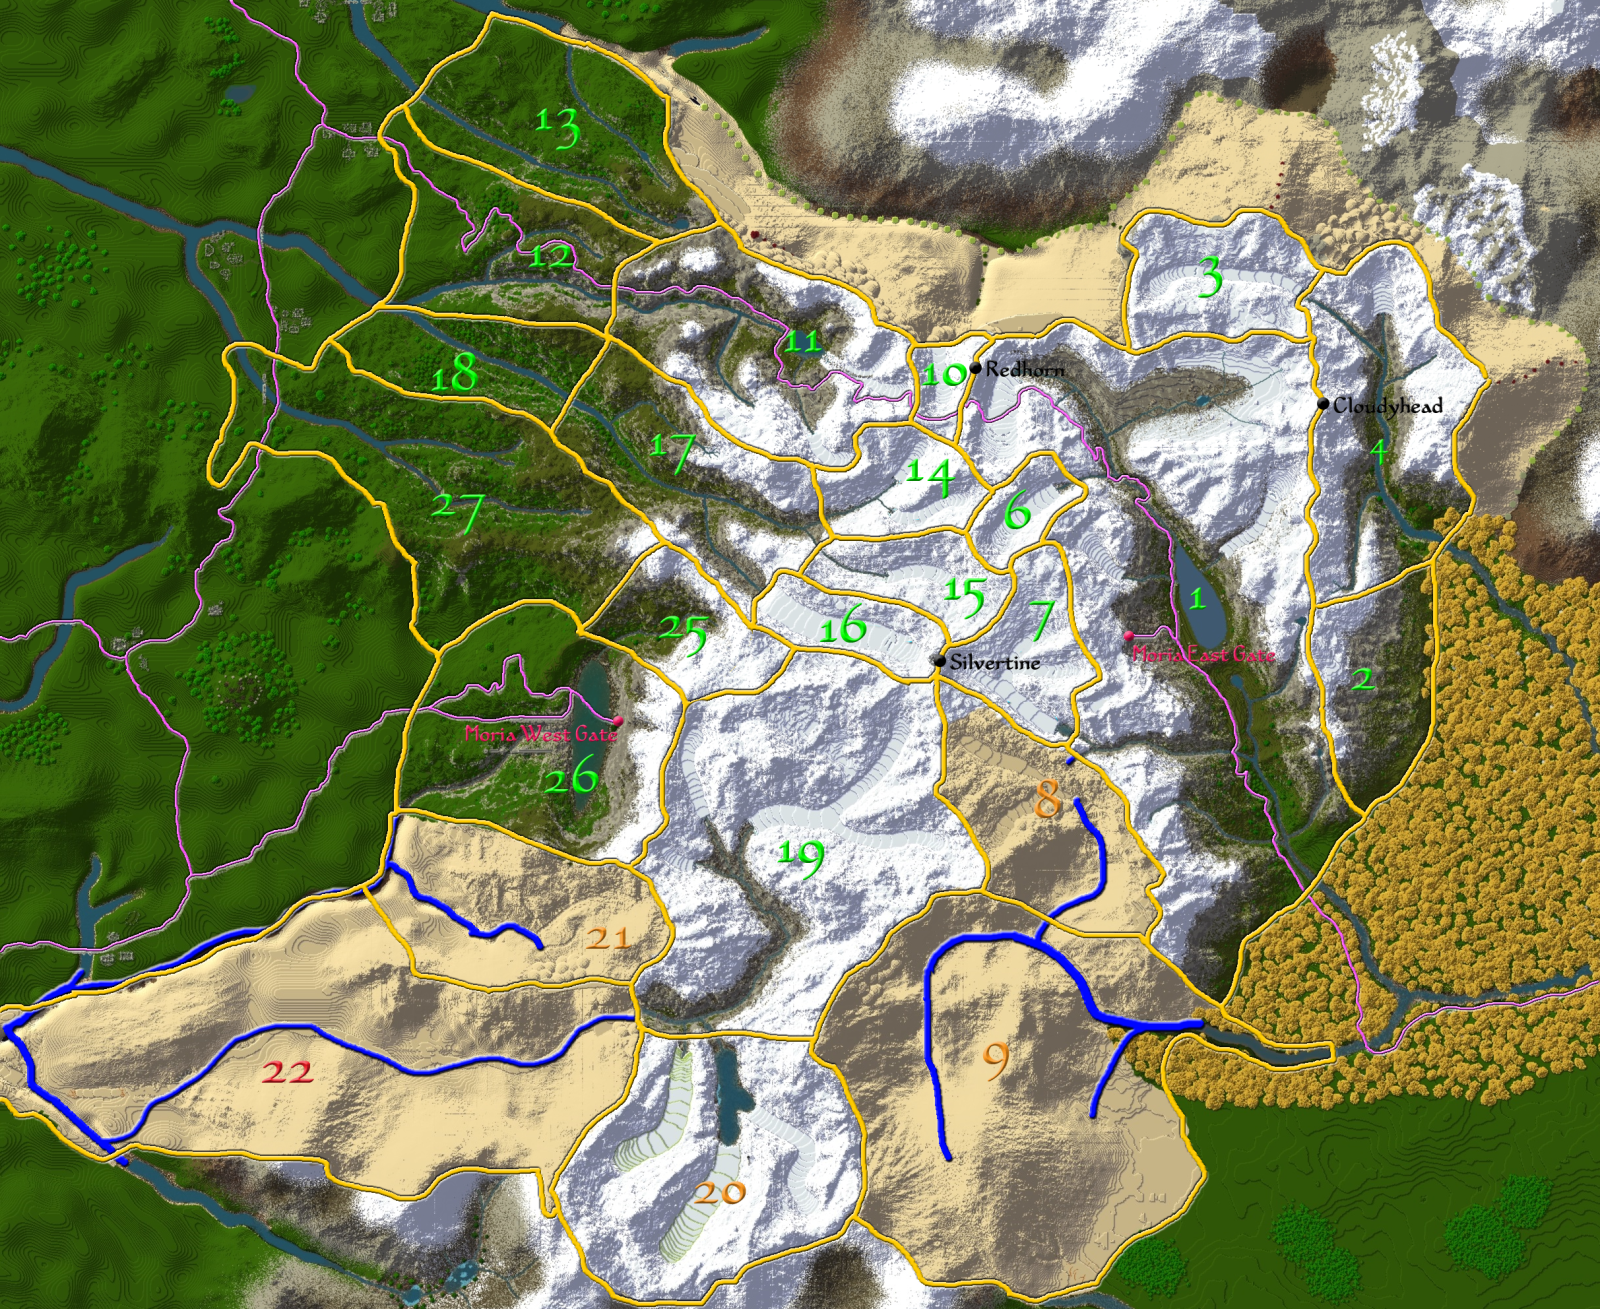
#1 - Dimrill Dale - [Finished] - @Finrod_Amandil
#2 - [Finished] - @oth0116
#3 - [Finished] - @KlemensPlusLukas
#4 - [Finished] - @DSESGH
#6 - [Finished] - @DSESGH
#7 - [Finished] - Silvertine East - @Finrod_Amandil

#8 - [Finished]
#9 - [Finished]

#10 - [Finished] - Upper Western Redhorn Pass Road - @Finrod_Amandil
#11 - [Finished] - Central Western Redhorn Pass Road - @Finrod_Amandil
#12 - [Finished] - Lower Western Redhorn Pass Road - @Finrod_Amandil
#13 - [Finished] - @Finrod_Amandil
#14 - [Finished] - @KlemensPlusLukas
#15 - [Finished] - @Finrod_Amandil
#16 - [Finished] - Silvertine West - @Finrod_Amandil
#17 - [Finished]
#18 - [Finished]

#19 - [Finished]
#20 - [Finished]

#21 - [Finished]
#22 - [Finished]

#25 - [Finished] - Sirannon Source - @Finrod_Amandil
#26 - [Finished] - Moria West Gate - @Finrod_Amandil
#27 - [Finished] - @Finrod_Amandil
 
Last edited:
4. Build Instructions

Overview:
4.1. Planning
4.2. Rough Terraforming
4.3. Fine Terraforming
4.4. Materials
4.5. Glaciers

4.1. Planning

A few general notes:

1. Don't think in single mountains. This is what we did in the White Mountains. Dont plan on where you want to place mountains, plan where you want valleys and mountain ridges. (Planning one of those mostly should imply the 2nd one)

2. Main Ridge. The Misty Mountains are most famous for having really few possibilities to cross them (High Pass, Redhorn Pass, Moria, Gap of Rohan, Gladden River Pass; the last one is debatable but I'll believe TolkienGateway that it exists). These are the only possibilities to cross the mountains, not because the men and elves were too lazy to do more, no! It has to be because the topography doesnt allow more passes. This can mainly be "assured" with the main ridge in the center of the Misties being constantly at y=200 and higher and/or always consisting of really steep and impossible-to-cross mountains.


3. Valleys. I dont want to do a thorough geology and glaciology course within this project. But some general facts about valleys should be known and be kept in ones head. It is to assume that Tolkien was inspired by the european Alps. As probably 95% of those were multiple times covered in kilometre-thick ice during the Ice Ages, water in any form plays an incredible important role in the landscape shapes occurring. Even though theres no source stating that Middle Earth had Ice Ages we have to pretend there were.
We can state that every single valley was eroded and formed by either a glacier or flowing water. Typically first by a glacier and later by water. While glacier shape so-called "U-valleys" (cause the cross-section is shaped like an U), flowing water shapes "V-valleys"
And as neither water nor glaciers can flow upwards, valleys don't do that either. Also the water had to flow somewhere, so don't make valleys with a dead end (Never.) A valley does not necessarily have to have a river or a glacier in it (put some rubble then instead), as it could only have water during spring when snow is melting.

4. Height limit. At least in section 1 the 3 peaks Redhorn, Cloudyhead and Silvertine* are the only peaks reaching up to the height limit. Keep other mountains clearly lower.
Note: On the eastern side you always have around 80 blocks less vertically to work with, as the land there is at y=100 up due to the Falls of Rauros, while at the west side lowlands lie at y=30 or even lower.

*Silvertine includes Durin's Tower!

5. Glaciers. Glaciers can be of every size, can be 30 blocks in length or 300. Just be sure you look at some pictures of glaciers to get a feeling of their shape. Btw: Glaciers are the most realistic river source. Far more realistic than just a stream of water randomly popping out of a mountainside.

6. Don't fear greater changes. Where Redhorn now is, was a valley with bottom at y=30 before. Don't hesitate to drastically fill up valleys or blow away whole mountains. (Its not prohibited to work with the existing terrain though, as far as it matches the rules above;))


Fine planning:
This step includes getting an idea of what elements the final terrain should feature. I don't recommend planning this with making a map and too much effort, just make up your mind what things you want to have where.

Here's a list of such elements with coordinates where to find em.

Mountain types:
- steep peaks (all sides are steep): /warp Redhorn, /tp 3051 238 -2097
- "two-faced" peaks (one side very steep, other side flat): /tp 3074 235 -2427 (group of 5 such peaks) /tp 2925 247 -2225 (single one)
- flat/round mountains: /tp 3189 215 -2300
- any combinations of the above.

Valley types:
- V-Valley: /tp 2999 164 -2051
- U-Valley: /tp 2819 164 -2611 An U-Valley includes typically a flat and wide bottom and steep sides
- Waterfalls:
small: /tp 3236 172 -2162
large: /tp 3057 186 -1959

Glaciers:
/tp 2809 178 -2602
Note: While terraforming, include the glacier as its easier to to know how it'll look in the end.
Broken-off glacier over a steep hillside: /tp 2558 243 -2617

Others:

- High Plateau (very wide valley, dont use too often): /tp 3210 191 -2585
- Terminal moraine: /tp 3125 139 -2178
- Meridial moraine (where two glacier unite): /tp 2595 149 -2604
- Glacier lake /tp 2520 114 -2666

~~~~~~~~~~~~~~~~~~~~~~~~~~~~~~~~~~~~~~~~~~~~~~~~~~~~~~~~~~~~~

4.2. Rough Terraforming

Cover in Sand

Not too much to say here, still a few small recommendations, most of them aren't necessary to follow.

- Replace snow patches with air, replacing with sand may make weird structures
- The terrain should be replaced to sand quite deeply down as the terraforming may well include chopping away major parts of the existing terrain.
- To achieve above it may be a good idea not to use a really big Replace Ball Brush, but rather use a smaller Overlay Brush, but with a Depth of 20 or even a bit more.
- This step also includes draining all water, aswell as removing all existing structures, which may include Trees and Glaciers. For big existing glaciers it may be possible to adjust them to match the proposed more realistic style seen below.
- While replacing, always use a Combo performer for the material you set, even if the data value you're setting is 0. This may prevent appearing of red sand later (doesn't matter too much, but its just the clean way to voxel)

Needed commands:
- Drain Brush: /b drain
- Ball Replace Brush: /b b mm OR /b b cm
- Overlay Brush: /b over m OR /b over c + /b over d20 (or whatever depth you want)


Materials:
- Snow (block): SNOW_BLOCK (ID:80)
- Snow (flat): SNOW (ID:78)
- Sand: SAND (ID:12)


Rough terraforming
If your planning includes filling up whole valleys or getting rid of whole mountains, here a few hints:

- For filling up valleys you best use the Filldown Brush. Even with bigger brush sizes and deep valleys this doesn't lag much due to no sand falling down. This can also be useful to make a rough base for mountain ridges out of nothing.
- For removing whole mountains use the Ball Brush.

30tmobc.png

(/\ Adjusting the terrain for relocated Mirrormere /\)

- For making mountain ridges drastically thinner you can use the Melt Brush with a big brush size.

Needed commands:
- Fill-Down Brush: /b fd
- Ball Brush: /b b m OR /b b c
- Melt Brush: /b e melt

Materials:
- Sand: SAND (ID:12)
- Air: AIR (ID:0)

~~~~~~~~~~~~~~~~~~~~~~~~~~~~~~~~~~~~~~~~~~~~~~~~~~~~~~~~~~~~~

4.3. Fine Terraforming
The challenge within this step does not lie in actual skills with voxel. No, you have to gain the feeling and understanding of how do mountains look like. For me who I am climbing around mountains every weekend with nice weather this is pretty easy to achieve, but I assume for people living in countries far away of any real mountains higher than 500m above sea level this may be actually something quite difficult. Even if it may sound dumb, go to google images and type in "mountains" or something like that.
Other than that theres not much that can be really helpful in written form except that I advise you to be self-critical and to think over areas you completed already again and again and ask yourself "is that logical, is that natural, how could have this mountain been shaped like I did it?" One good question is about water: "Where does melting snow go to?" or "Where does that river I made have its water from?"

What I can do is list all the brushes I mainly used for most of the terrain and what for (usually):


Ball Brush
/b b m
- lay out mountain range sections, including where to have peaks. I recommend making this outline higher as the final range will be, as its easier to melt away material to get nice peaks than adding material in the finer steps of voxelling.

Lift Brush
/b e lift
Arrow adds material vertically.
Gunpowder removes material vertically.
- make sharp peaks with small brush sizes.
- make an existing mountain higher.
- add peaks to a mountain range or add foresummits into the sides of existing mountains.
- dig valleys or make valleys deeper
- dig river beds and lakes

Melt Brush
/b e melt
Arrow removes material horizontally
Gunpowder adds material horizontally
- make "boring" round summits to "two-faced" mountains (see above) by adding material to one side of the peak.
- add ridges on a mountain side
- adjust mountain sides by either adding or removing material (Hint: You can make homogenously steep mountain sides more interesting by adding small plateaus and vertical cliffs, those plateaus can also be slanted!)
- rough-merge steep mountain sides to valley bottom.

Disc Brush
/b d m
- used for rough terraforming of flat land as high plateaus and shallow valleys.

Smooth Brush
/b e smooth
- get rid of single blocks (mostly caused by melt and lift brush)
- general smoothing
- attention: If used too much on mountain peaks those may get blocky.

Blend Ball Brush
/b bb
- smooth things the smooth brush refuses to smooth.
- soften to edged cliff edges
- soften "blocky" mountain peaks.
- attention: Used to much always ends up in strangely regular terrain shapes. Only use with single clicks.

Blend Disc Brush
/b bd
- used for nicely transitions from steep mountain sides to flat valley bottoms.

Filldown Brush
/b fd
- lay out mountain ridges (make a base and then continue with ball brush)

Random Erode Brush
/b re
- If you have a big, flatter area that seems too uniform and boring, some clicks with this brush can help. Used with gunpowder it tends to add material and vice versa with the arrow.
 
Last edited:
I don't get why you have all this info here. Surely most off this only applies too designers as artists or any other non-staff don't have voxel.
 
4.4. Materials

When doing this last big part of voxelling, follow the step by step guide below closely. Some steps may be irrelevant for your section if you only have terrain very high up.

Introduction: Altitudinal zonation
2nbhkat.jpg

The model of altitudinal zonation is used to generally describe vegetation in certain heights of mountain ranges, depending on main weather features as wind, temperature, rain/snow and so on.
We will use the simplified model shown above with the respective zone border heights for west and east as depicted. (Theres always a tolerance of +/- 5-10 blocks).

The zones have the following features to be voxelled:

Nival:
- 100% snow coverage
- glaciers
- (biome irrelevant)

Alpine:
- Biome: Jungle
- Full grass up to about the middle, then fading out
- Snow in sun-protected areas
- Few bushes on the lower border
- Flowers

Montane:
- Biome: Plains
- Full grass except on steep terrain
- Bushes
- Forests, single trees


Recommended order of voxelling:
  1. Glaciers
  2. Snow
  3. Grass (blocks)
  4. Gravel
  5. Biomes
  6. Rivers
  7. Grey Stone
  8. Trees
  9. Grass + Flowers
  10. Bushes


1. Glaciers

Link to swiss map of the area with the most glaciers in switzerland:
http://map.geo.admin.ch/?X=151349.0...lkarte-farbe&catalogNodes=532,533,567,653,639

0. The initial situation should be your glacier valley, all in stone, and your glacier being in stone already present.

1. Dig out the glacier so you get the empty valley. Start with /b e lift to dig down around 6-12 blocks (depends on glacier width) and then make a nice u-shaped valley using /b e melt and /b bb + /b e smooth.

2. Fill in the glacier with sand, using the /b fd brush. The decline depends on the terrain, but make it regular. In the upper end section however the glacier should get steeper and blend with the mountains surrounding that area (called a "cirque").
botnbrae.jpg

3. Use /b bd to refine the contours of the glacier levels. At the upper start the levels are alwas shaped concave, this means that the sides are further down the valley than the middle. Wide glaciers though get more and more convex: the middle is flowing faster then the edges. Most glaciers are too narrow to get convex though)
Smooth out the levels to get homogenous curves.
2hydisp.jpg

4. Replace the top layer of sand (depth 1!) with Snow Blocks (ID 80)

5. Replace the rest of the sand with packed Ice (ID 174)

6. Optional, but recommended:
Add a few glacier ravines at the top, where the glacier starts to flow.
Glacier ravines shall be pretty narrow and as deep as possible; you can't see any stone inside the ravine!
28vue7m.png

5af2pl.png

7. Adventurers / Artist Job:
As placing the layered snow by hand takes ages, for every layered snow height one color of wool is placed and after that replaced with the respective block using voxel.
Note:
- Use default pack and use the wool colors seen below as this is visually easiest to understand what color stands for what height.
- Make sure under every wool block is snow, not packed ice! Else the layered snow will just disappear.
- Use every wool color in equal amounts, also if the levels are really narrow (cf. images below)
- Green wool stands for full block height layered snow. Its used is to prevent lightbugs that would occur when layered snow of any height is placed next to a solid block. Thus green wool has to be used differently than other wool colors and should always be placed before all the other wool.
Green wool is added along the contours of every level and the sides of them. Be sure to surround the solid blocks (snow/stone) completely, also on the corners! (cf images)
- Don't merge the glacier with the mountains on the sides, let the levels run straight into the mountains resp. green wool lines.
- In narrow levels, any other wool color can be placed upon green wool; treat green wool as if it were normal snow blocks.
- If you have glacier ravines, make the snow along the edges descend a bit into the ravine. Add some layered snow into the ravines.
Narrow levels:
vhup9t.png

Flat levels:
be6gzl.png

674l7b.jpg

8. Replace the wool with layered snow. To make that quickly, build yourself this tool:
hu20b7.png
Now you can right-/left click with the arrow/gunpowder to quickly set place and replace IDs and data values. Just sneak+left-click the snow blocks and sneak+right-click the wool blocks. (After the first one you only have to set the data values again with the gunpowder)
Start with the green wool!

9. Artist Job:
Dig and detail the tunnel under the glacier.
- (Staff) Use /b b mm with /vr 174 and /v 0 and decreasing brush size to dig the main tunnel. Dont dig in further than half of the glacier length, use dynmap to check your location.
- (Artist) Refine tunnel shape, add and break some ice blocks to give it a natural and interesting shape.
- (Artist) Dig out a 1 deep riverbed into the (stone) tunnel floor. The width should be so that on each side of that trench is still one block between trench and tunnel wall.
- (Artist) Dig many 1x1 block crosssection tunnels into the sides of the main tunnels. Place a hidden piece of netherrack (water source) at their ends.
- (Artist) Add some gravel to the riverbed
- (Artist) Add more netherrack where the terrain isnt steep enough for the water to flow.
- (Staff) Add some normal ice and layered snow in the tunnel, both with increasing amount towards the glacier gate.
2rcuyo3.png

10. Refine the glacier gate:
2wm0sox.png

2. Snow
The high peaks shall be covered in snow pretty completely. In the following, a series of different brushes will help making a nice looking coverage (as just overlaying everything with /b over d1 looks aweful)

1. make a wool line along the mtns at y=150 (west side) resp. y=185 (east side) to mark border of the nival zone. Steps 2-4 to be done from the wool line upwards.
2.
/b sover s2000 g4000 r4 + /b sover d3 + /v 80 + /b 3 - /b 10
Cover around a third of the blocks with that brush. Use with caution near steep cliffs so that there not all the stone gets converted to snow.
3.
/b sover d2 + /b sover mm + /vi 1
Go over the same area again with this brush, around 2/3 should be covered now.
4.
/b over d1 + /b over mm
Go over the same area again, but now use the normal overlay brush and cover all remaining blocks.
5. Now comes the more complicated part: More snow is added in lower areas where the sun didn't melt it. Middle-Earth being on the northern hemisphere sun mostly shines upon hillsides facing south, but only for a short time per day reaches the north facing sides. Thus more snow can lie on those northern slopes and aswell flat areas shielded from the sun by mountains. Add more snow with the normal overlay + d1 brush down about 10-15 blocks (depending on how covered it is)
6. Lastly use the splatter overlay brush with default settings (but depth 1!) and splatter snow along the borders of the current snow to make a smooth transition. Thus snow can get as far down that it can overlap with grass a bit.

3. Grass
depth 1!
- Full Grass up to ~y=120 (west) / ~y=140 (east). Leave blank steep terrain parts. Leave future riverbeds grass-free
- Use the normal splatter overlay brush to add more grass 10-20 blocks higher than the full grass. Only put grass onto flatter areas. Also cover the left blank mountain faces from before to a nice looking extent.


4. Gravel
In all small dells and valleys without water add gravel where the terrain is not too steep. Normal splatter overlay is fine, but click mutliple times to get rather dense clusters.

5. Biomes
Tip: If you use optifine, go to Video-Settings-->Quality and turn OFF smooth biomes to see more clearly what you're doing.

- All the grass in the montane zone (see pic above) shall be in in jungle biome. You dont need to worry about any areas without any grass.

For a smooth biome border do the following:
1. Add some more jungle biome by placing a rim of irregular brush size 2 dots of jungle biome. Irregular meaning, dont make a dotted line with always same space in between. Make the rim sometimes a bit wider and narrower and sometimes make dots close together or merge with existing jungle biome.
2. Do the same along the /b 2 rime but now with /b 1
3. Lastly make a rim with plains biome into the full-coverage jungle biome section with brush size
How it should look like in the end:
wa0fo4.png


6. Rivers & Lakes

Use small /b e melt and /b e lift brushes to optimize the river shape. This mainly includes not having a way too wide river and also that it has a natural shape which means that it gets increasingly wider (preferably when two rivers meet) and doesn't get wider and narrower all the time. For that you may start using a /b 3, /b 2 lift brush to dig the riverbed into the valley bottom and then smooth it out (/b e smooth).
Use normal splatter overlay brush to add dirt and gravel to the riverbed (dont replace all the stone). No dirt where theres no grass next to the river. Lastly replace a few stone blocks with mossy stone blocks (ID 98, data v. 3)
Now fill the riverbed up
from the bottom with netherrack using the fill-down brush (/b fd). Flat sections can be done with brush sizes up to 10, steep ones with only /b 3 or 2, in very steep rivers no netherrack at all may be needed. Small rivers should mostly be 2-3 blocks deep. Convert the netherrack to water and use the melt brush to get out the last irregularities. If major changes had to be done you may need to drain the river again and use /b bb and /b e smooth to achieve a nice cross-section again, also add some materials again if a remarkable amount was lost.

If your source is not a glacier:
- make melting snow the source of the river, for an example see at /tp 3019 205 -1928
- Else make a bigger or smaller cave. examples at /tp 2317 84 -2834, /tp 2183 100 -2786

7. Grey stone
This texture is added now so that the work is minimal. In this step, replace about +/- 50% of the still visible stone with dark grey stone (ID: 159, data v.:9).
Used is a brush that may not be too common: The Blob brush, which basically is just a splatter brush with always one seed, only the growth parameter can be given. The result is a usually dense cluster of selected blocks centered around the point clicked and fading into surroundings nicely. Attention: the result is highly dependant on the brush size, so dont use bigger brushes for bigger areas!
commands:
/d
/b blob cm
/b blob g3000
/v 159
/vi 9
/vr 1
/b 11

No further geological knowledge is brought into this, just dont make a regular pattern, generally do single clicks but occasionally also drag some lines with that brush over the terrain. Be sure to check the Redhorn pass area to get an idea.
Also work on where only small amounts of stone are visible in the flatter areas.

8. Trees
Haven't made too many experiments with this stuff yet, but here some info:
Spruces can grow up higher than broad-leafed trees. Dont use broad-leafed trees on the Lothlórien side and on the eregion side probs up to y=60-70. Spruces can be used a bit into the alpine section.
Stencillist:
/b sl tree_spruce
for more go to /warp stencillists

Be sure to nicely blend the roots (for bigger forests as job as usual)

Splatter replace some grass to dirt inside denser forests.

9. Grass and Flowers
Voxel (splatter) overlay brushes affect normally all natural blocks, e.g. dirt, grass, sand, gravel and stone. The last one is a problem cuz we dont want any grass on stone. For this reason, use the overlay replace brush to replace all stone to an unnatural material temporarily (depth 1!), whether its diamond blocks or glass is irrelevant :p
Now I suggest switching to default pack for the grassing part as its better visible like that. Use the /b sover c brush with normal parameters and /v 31 and /vi 1 to place the grass. Dont cover all grass blocks.
PS: Grass on gravel is fine.
PPS: Dont worry about grass on the grey stone, stained clay doesnt count as natural material.
PPPS: If the brush does overlay still all blocks, try typing /b sover some

Either by hand, single snipes or a splatter overlay brush with low seed (for example maybe /b sover s70 g1 r1) place a few lonely flowers. Inspired by the two probably most famous flowers of the alps we use /v 38 + /vi 3 (edelweiss) and /v 38 + /vi 5 (gentian):
Enzian_Ganghofersteig.jpg

leontopodium_alpinum_Edelweiss_428x600.jpg


Now type /b over all (command to overlay all blocks) and /b over mm to replace the placeholder material back to stone. Do /d afterwards or you may be wondering why the overlay brush behaves weird.

10. Bushes
In the very final step we place a few bushes. This is a great adventurer job.
Setup:
Place some oak and jungle wood logs (6-side bark) in the upper montane/lower alpine section. Mainly place them in wind/weatherprotected places as below steep hillsides. You can also make them in a kind of cluster here and then to get a connected, big bush. Dont be stingy with those logs ;)
The bushes shall be rather flat and not high; and not too small. Mostly use the birch leaves but also some bushes with jungle or oak leaves are OK. However dont use jungle leaves in places with jungle biome (gets too bright), also dont use oak and jungle leaves on the Loth side.

Jungle and Oak leaves can be combined in one bush, else use one leaf type per bush.

Congratulations!!
If you made it this far, your section is done! Be proud of your work and and know me being thankful to you forever for your work :)


Last edited:
Glacier Guide for Jobs

This guide shows, what jobs may be run by staff for Artists aswell as for Adventurers. If the staff hosting the job redirects you to this post, please read quickly through it to get a general idea of what you may be asked to help with.

If any directions from your job hoster contradicts this guide, its best to tell that to the staff, but if he is sure of what he wants, follow what he explains.

1. Optional:
Add a few glacier ravines at the top, where the glacier starts to flow.
Glacier ravines shall be pretty narrow and as deep as possible; you can't see any stone inside the ravine!
28vue7m.png

5af2pl.png

2. Adding wool for layered snow.
As placing the layered snow by hand takes ages, for every layered snow height one color of wool is placed and after that replaced with the respective block using voxel.
Note:
- Use default pack and use the wool colors seen below as this is visually easiest to understand what color stands for what height.
- Make sure under every wool block is snow, not packed ice! Else the layered snow will just disappear.
- Use every wool color in equal amounts, also if the levels are really narrow (cf. images below)
- Green wool stands for full block height layered snow. Its used is to prevent lightbugs that would occur when layered snow of any height is placed next to a solid block. Thus green wool has to be used differently than other wool colors and should always be placed before all the other wool.
Green wool is added along the contours of every level and the sides of them. Be sure to surround the solid blocks (snow/stone) completely, also on the corners! (cf images)
- Don't merge the glacier with the mountains on the sides, let the levels run straight into the mountains resp. green wool lines.
- In narrow levels, any other wool color can be placed upon green wool; treat green wool as if it were normal snow blocks.
- If you have glacier ravines, make the snow along the edges descend a bit into the ravine. Add some layered snow into the ravines.
Narrow levels:
vhup9t.png

Flat levels:
be6gzl.png

674l7b.jpg

Staff will now replace the wool with layered snow.

3. Glacier tunnel
Dig and detail the tunnel under the glacier.
- (Staff) Use /b b mm with /vr 174 and /v 0 and decreasing brush size to dig the main tunnel. Dont dig in further than half of the glacier length, use dynmap to check your location.
- (Artist/Adv.) Refine tunnel shape, add and break some ice blocks to give it a natural and interesting shape.
- (Artist/Adv.) Dig out a 1 deep riverbed into the (stone) tunnel floor. The width should be so that on each side of that trench is still one block between trench and tunnel wall.
- (Artist/Adv.) Dig many 1x1 block crosssection tunnels into the sides of the main tunnels. Place a hidden piece of netherrack (water source) at their ends.
- (Artist/Adv.) Add some gravel to the riverbed
- (Artist/Adv.) Add more netherrack where the terrain isnt steep enough for the water to flow.

- (Staff) Add some normal ice and layered snow in the tunnel, both with increasing amount towards the glacier gate.
2rcuyo3.png

4. Refine the glacier gate:
2wm0sox.png
 
Last edited:
It goes along with our 'better communication' between staff and nonstaff. This is what you need to do for staff forums too, so he just copies it here. He did do an extensive job and a very good one.
Yeah I get it now. Sorry chaps.
 
I got enough boulders now. Thanks very much to everyone who built any!

- Boulder Freebuild closed -
 
When you redo the High Pass, Low Road areas, keep in mind that the Beornings are supposed to control the region with toll stations. Gloin said as much at Rivendell while talking to Frodo before the Council of Elrond. Since the Beornings are charging tolls for keeping the pass safe, the goblin camps should be limited, isolated or far from the passes, as the Beornings would've wiped them out. Only bringing this up, because the Beorning toll stations were missed with the last High Pass build, and the goblin camps were probably too numerous.

Also I read somewhere that there was a lesser used mountain pass near the Gladden River source, maybe look into that possibility when doing that section of mountains down the road?

Also those glaciers look awesome, great work!

Nice find about the toll stations!
For the Gladden Pass (which we already discussed once) the source brought up there is rather vague but I will make that pass; also tolkiengateway states too that it existed.
 
I just want to reiterate how utterly amazing the amount of planning you've put into this is. To hell with Minecraft, I've never seen terrain planned out this intricately in any game. Even the fact that you placed a moraine at the southern end of Mirrormere had me totally nerding out. My only fear is that now we'll look at every other mountain or hill on the server and say "welp these sure don't measure up any more REDO TIEM"
 
I just want to reiterate how utterly amazing the amount of planning you've put into this is. To @#!*% with Minecraft, I've never seen terrain planned out this intricately in any game. Even the fact that you placed a moraine at the southern end of Mirrormere had me totally nerding out. My only fear is that now we'll look at every other mountain or hill on the server and say "welp these sure don't measure up any more REDO TIEM"
Sounds like fun! Just gotta cancel all of our appointments for the next few years....
 
Top